Someone can not stand in the house remains, scraps, boxes. Someone can easily find them for domestic use. And not only so, but with a twist.
Materials:
Tight shoe box.
Caulking
PVA glue
Latex paint.
Tinting formulations for paint
Wide molding
Serebryanka powder.
Glue for ceiling tiles or all-purpose adhesive
Board
Tools:
Prototype knife, wood stapler, putty miter box.
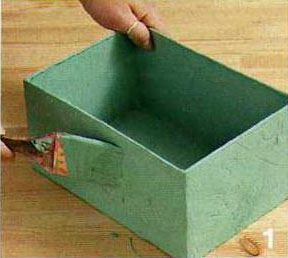

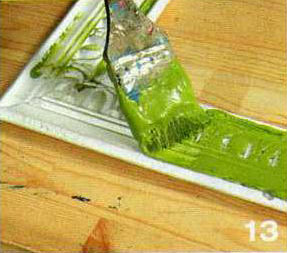
1 - Prepare a mixture of primers for the surface box: Mix in any capacity, 2 / 4 parts filler, 1 / 4 of PVA glue and 1 / 4 of latex paint. Thoroughly mix the composition, add color to paint. Cover the composition of the surface of the box inside and out, doing it with a broader brush. How should dry surface at room temperature.
2 - Make another mix - mix 3 / 4 of the filler with 1 / 4 PVA glue. Stir well, add the color of paint the same color. Apply the mixture to the surface with a spatula "herringbone" every time "wiping" a spatula on the surface. Cover the surface composition inside and outside. Good dry surface is very important!
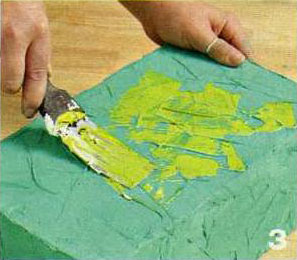
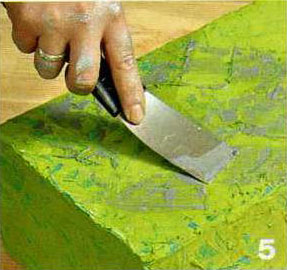
3 - Prepare the exact same composition but a different color. Colors Kolerov select such that the surface after decorating the "game". Apply by trowel to the surface composition as described in Section 2. How should dry the surface.
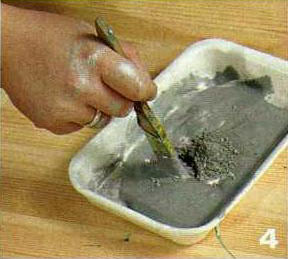
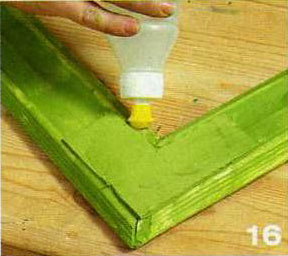
4 - In a suitable tank mix PVA glue with silverfish.
5 - Apply the mixture to the surface, toniruya it. This layer is also sure to dry it.
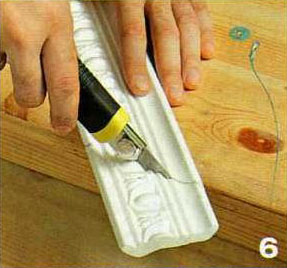
6 - With miter box piled cutting lines with a knife, cut a wide molding on the side so that you could make a frame to the open end of the box. Part of the frame should have a good dock at the corners.
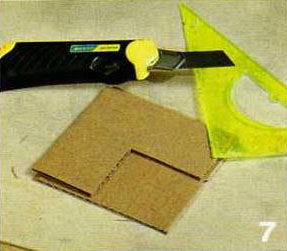
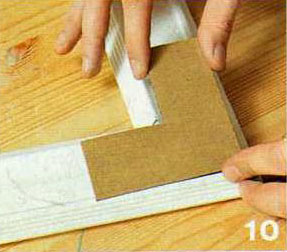
7 - Out of cardboard cut more corners to reinforce corners.
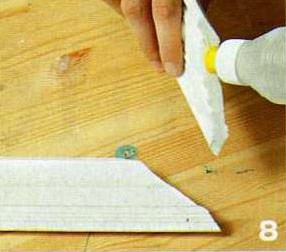
8 - Put it on slices molding universal glue or glue on ceiling tiles. Connect the parts.
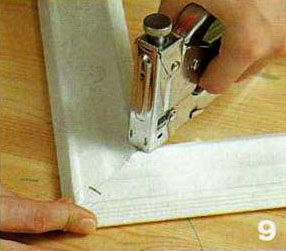
9 - Reinforce the corners of frames with staples furniture staples from the back side.
10 - To the corners of the finished frame is not to spread, attach to the back of the corners of a rigid cardboard. Using a universal glue.
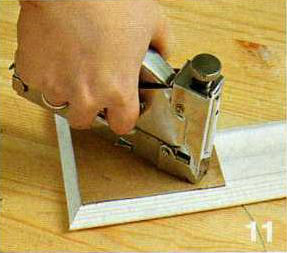
11 - Further strengthen corners with staples staples.
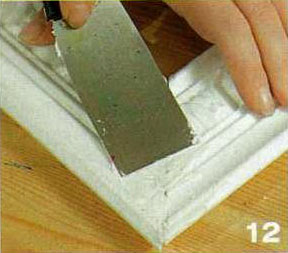
12 - Zashpaklyuyte corners of the frame. Allow sealer to dry.

13 - Colour the finished frame stock, which was prepared in Section 3. Apply the composition from all sides, not forgetting the ends of the frame. Dry the first layer.
14 - almost dry brush, apply the first layer composition, which covered the ground. TONE protruding part of the frame, giving it a worn, aged look.
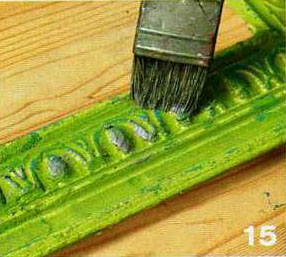
15 - "Silver" composition coat dried surface of the frame. The frame should look "shabby", repainted several times.
16 - When the surface of the frame dries, apply a universal glue on its inner edge, lay the frame on the edge of the box, put a weight on top. If you do not regret the time and both must be dried each layer, the frame will turn smooth and strong enough.
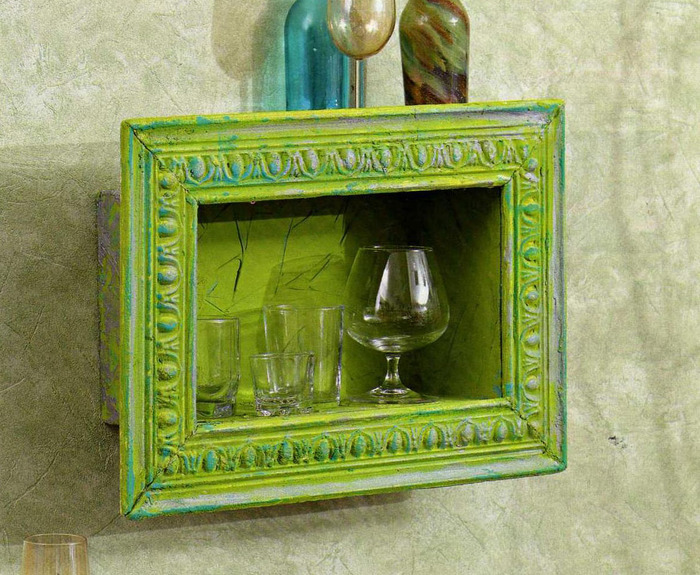
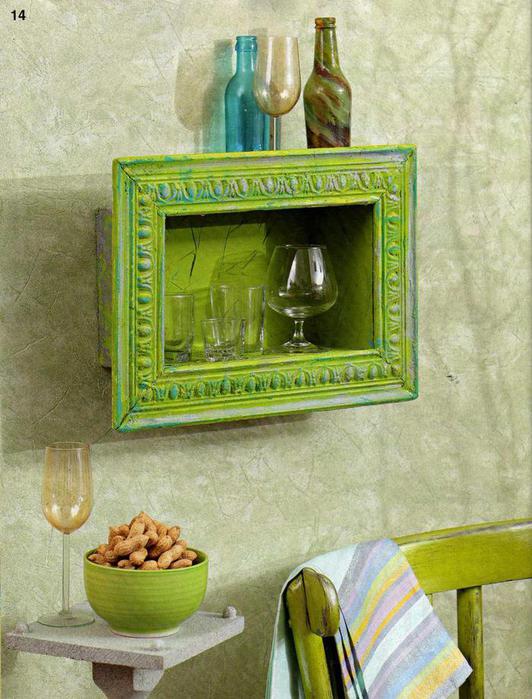
Result.
Không có nhận xét nào:
Đăng nhận xét